- Text-to-model
- Image-to-model
- Multi-view model generation
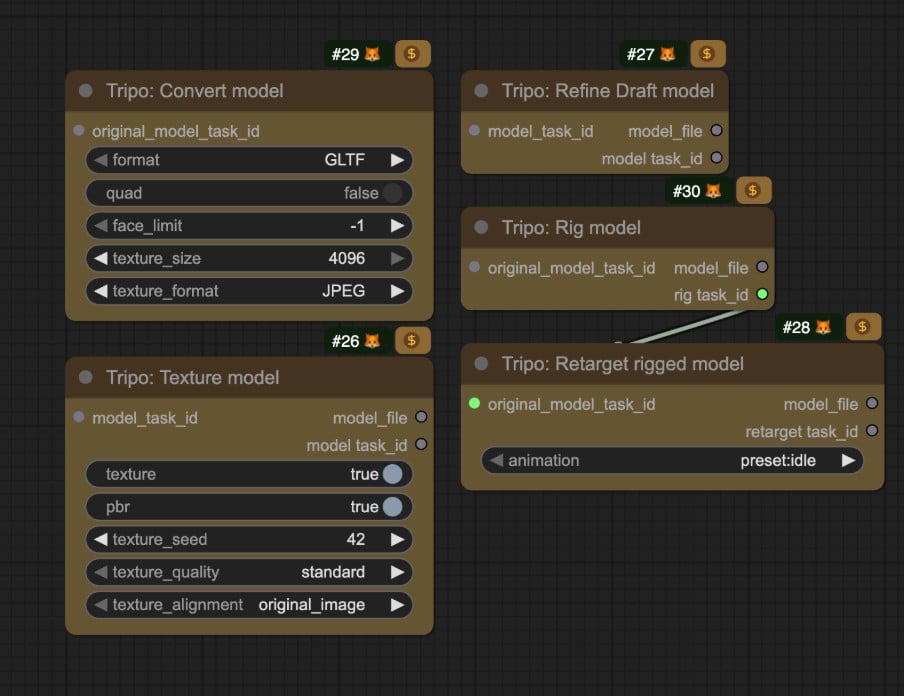
- Rig model
- Retarget rigged model
Text-to-Model Workflow
Generate a 3D model from a text prompt with Tripo’s text-to-model capabilities.
Run Text-to-Model on Cloud
Try the Text-to-Model workflow instantly on Comfy Cloud.
Download Text-to-Model Workflow
Download JSON to run locally in ComfyUI.
2. Complete the Workflow Execution Step by Step
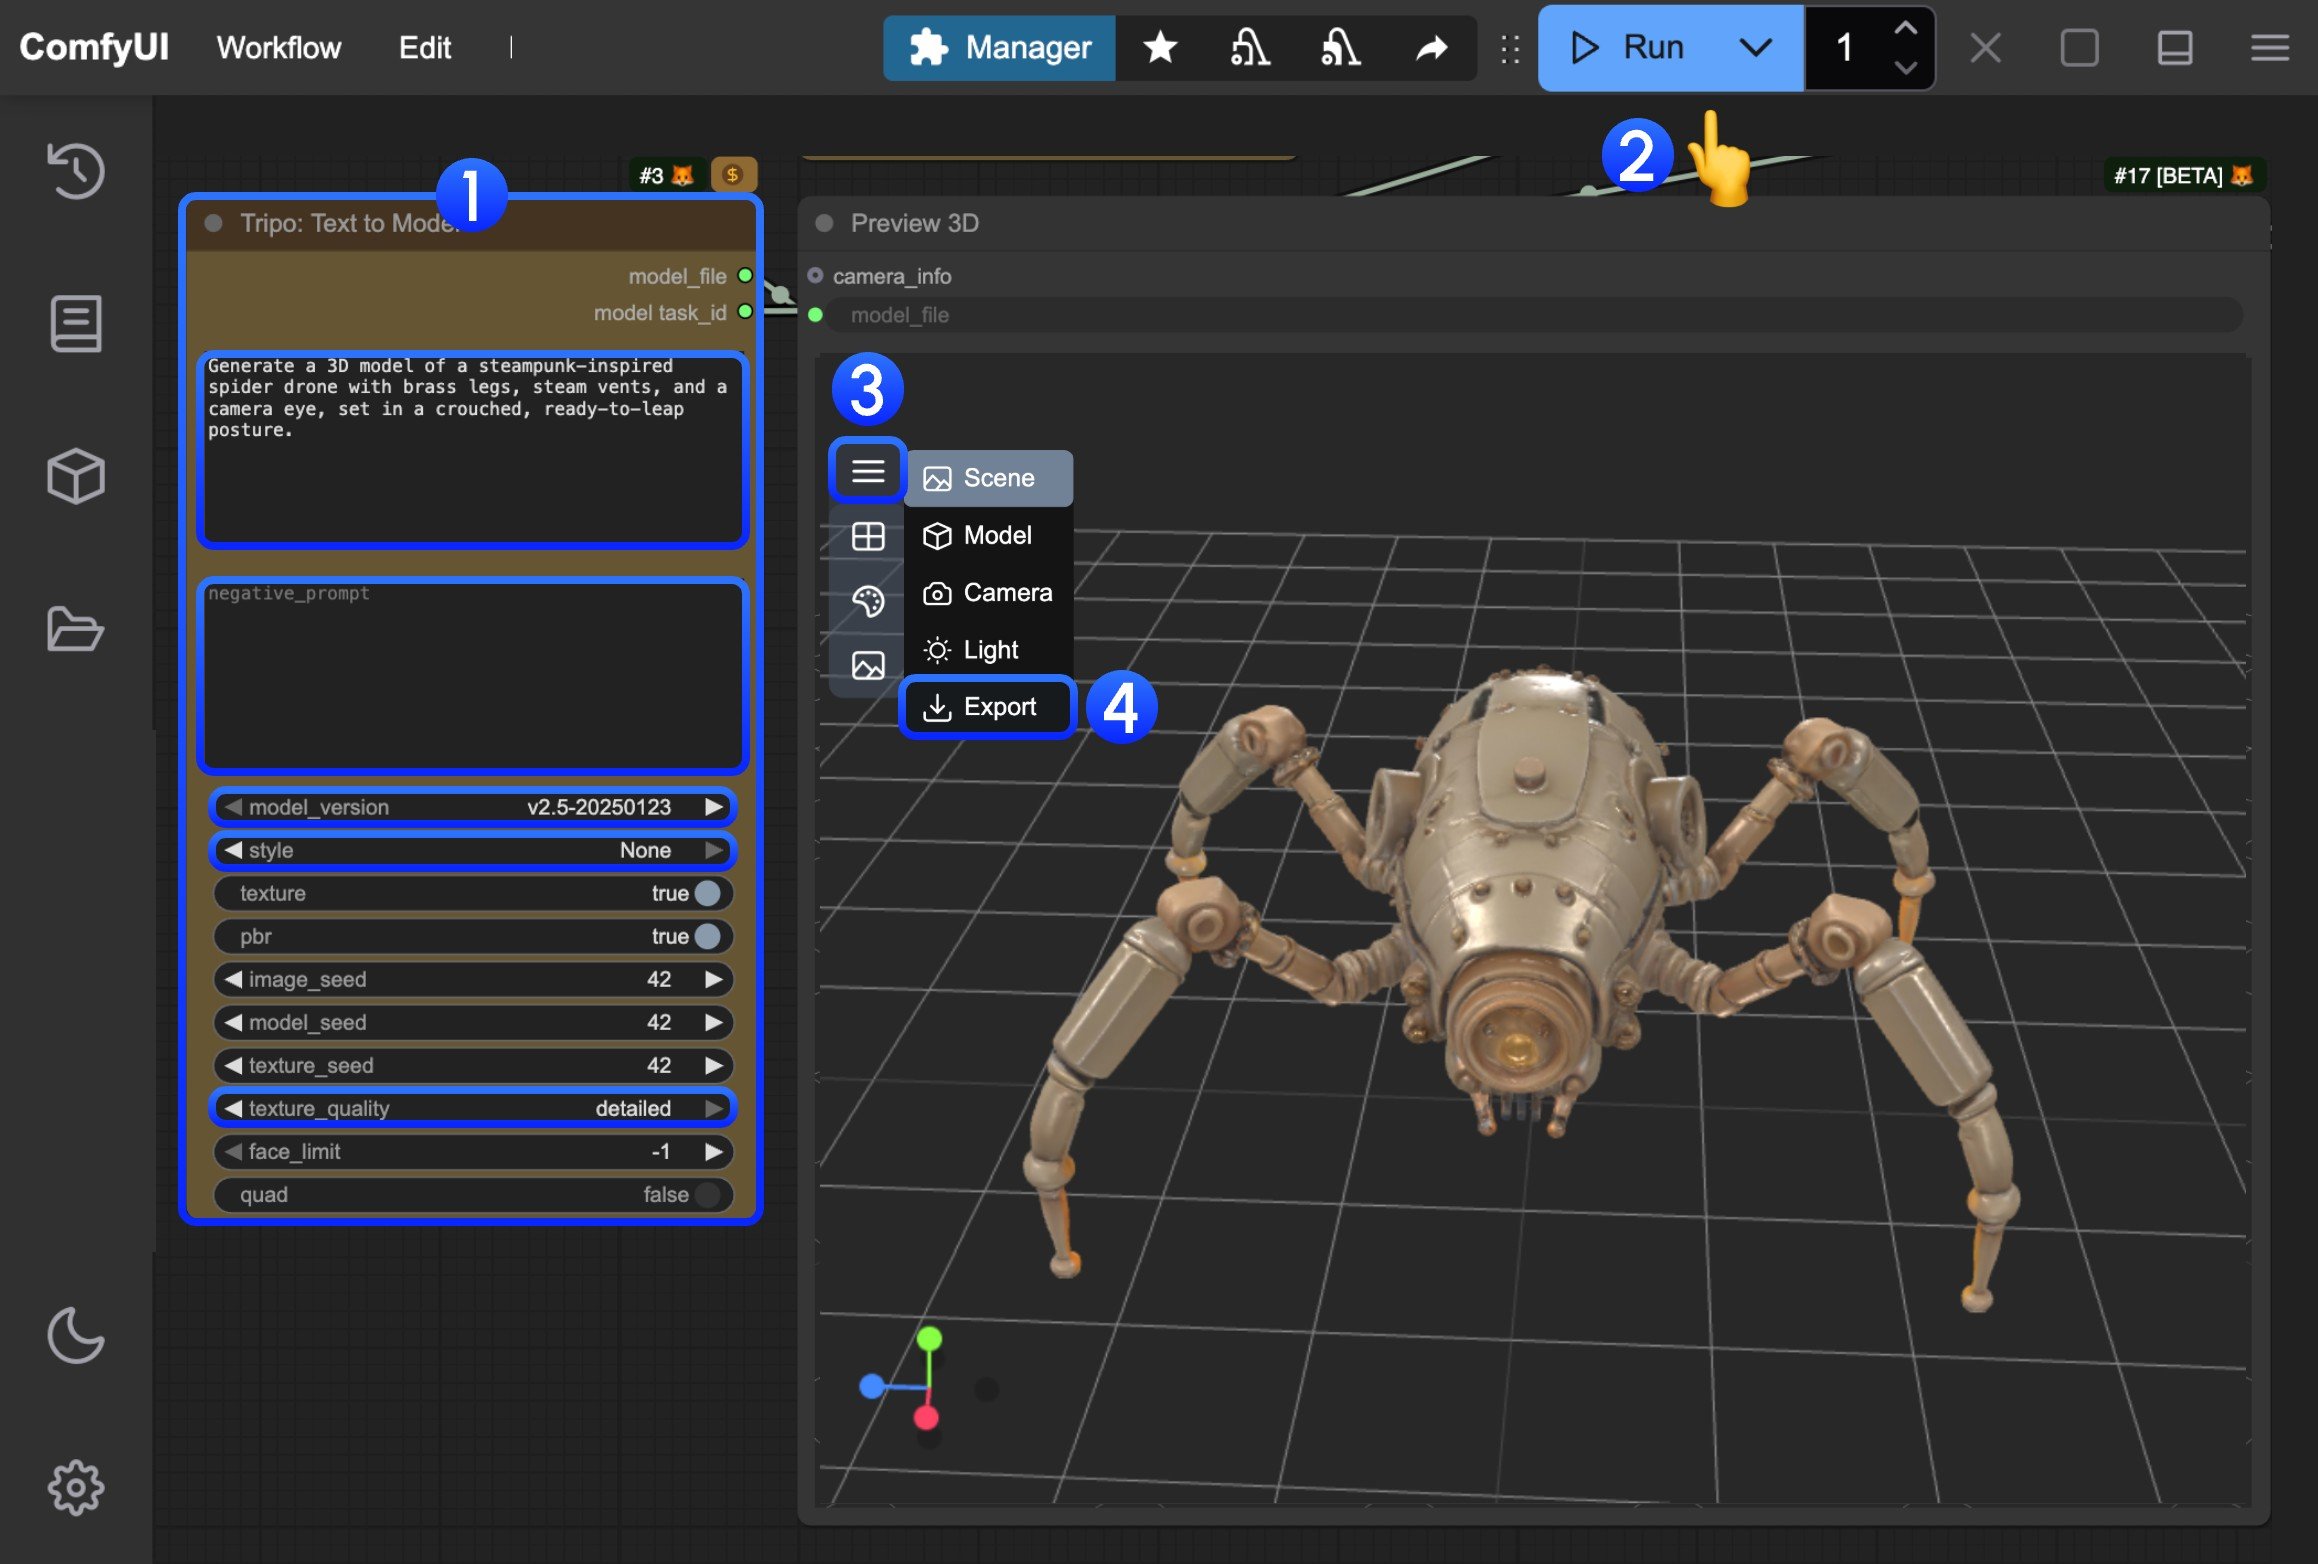
- In the
Tripo: Text to Modelnode, input your prompt in thepromptfield- model: You can select different models, currently only v1.4 model supports subsequent optimization with
Tripo: Refine Draft model - style: You can set different styles
- texture_quality: You can set different texture qualities
- model: You can select different models, currently only v1.4 model supports subsequent optimization with
- Click the
Runbutton, or use the shortcutCtrl(cmd) + Enterto execute model generation. After the workflow completes, the corresponding model will be automatically saved to theComfyUI/output/directory - In the
Preview 3Dnode, click to expand the menu - Select
Exportto directly export the corresponding model
Image-to-Model Workflow
Generate a 3D model from a single image input.
Run Image-to-Model on Cloud
Try the Image-to-Model workflow instantly on Comfy Cloud.
Download Image-to-Model Workflow
Download JSON to run locally in ComfyUI.

2. Complete the Workflow Execution Step by Step
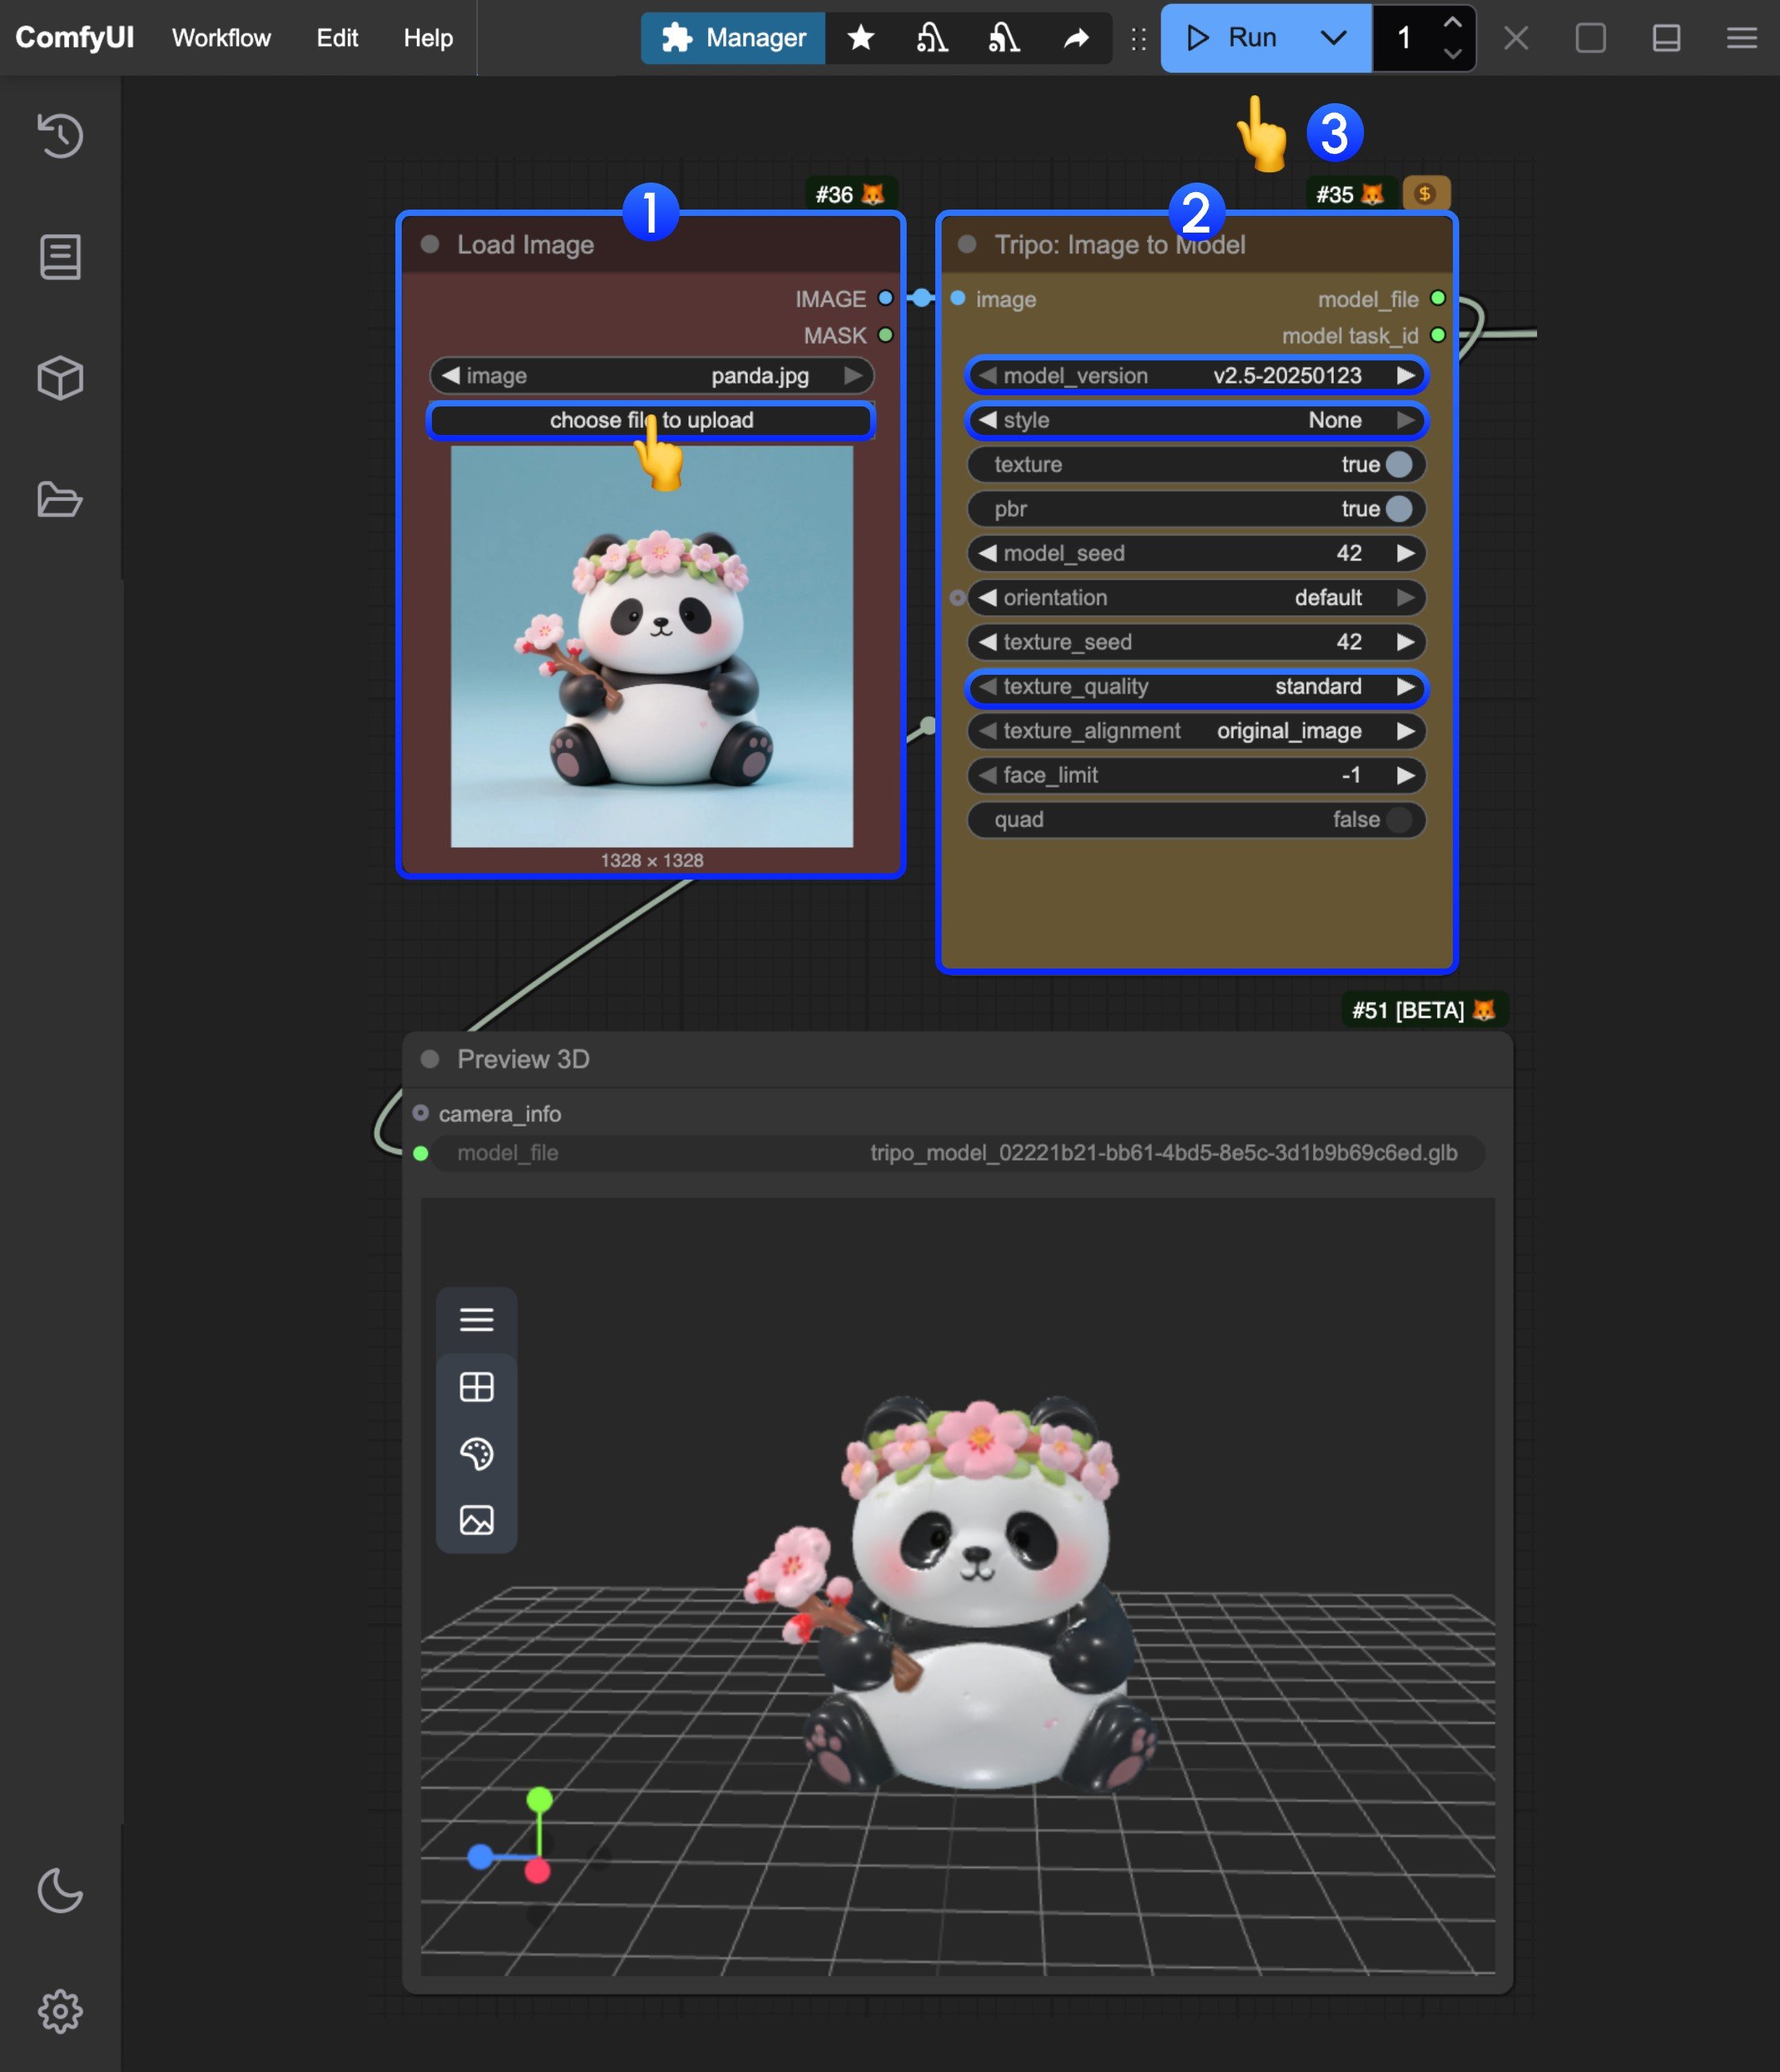
- In the
Load Imagenode, load the provided input image - In the
Tripo: Image to Modelnode, modify the corresponding parameter settings- model: You can select different models, currently only v1.4 model supports subsequent optimization with
Tripo: Refine Draft model - style: You can set different styles
- texture_quality: You can set different texture qualities
- model: You can select different models, currently only v1.4 model supports subsequent optimization with
- Click the
Runbutton, or use the shortcutCtrl(cmd) + Enterto execute model generation. After the workflow completes, the corresponding model will be automatically saved to theComfyUI/output/directory - For model download, please refer to the instructions in the text-to-model section
Multi-view Model Generation Workflow
Generate a 3D model from multiple view images for enhanced accuracy.
Run Multiview-to-Model on Cloud
Try the Multiview-to-Model workflow instantly on Comfy Cloud.
Download Multiview-to-Model Workflow
Download JSON to run locally in ComfyUI.

2. Complete the Workflow Execution Step by Step
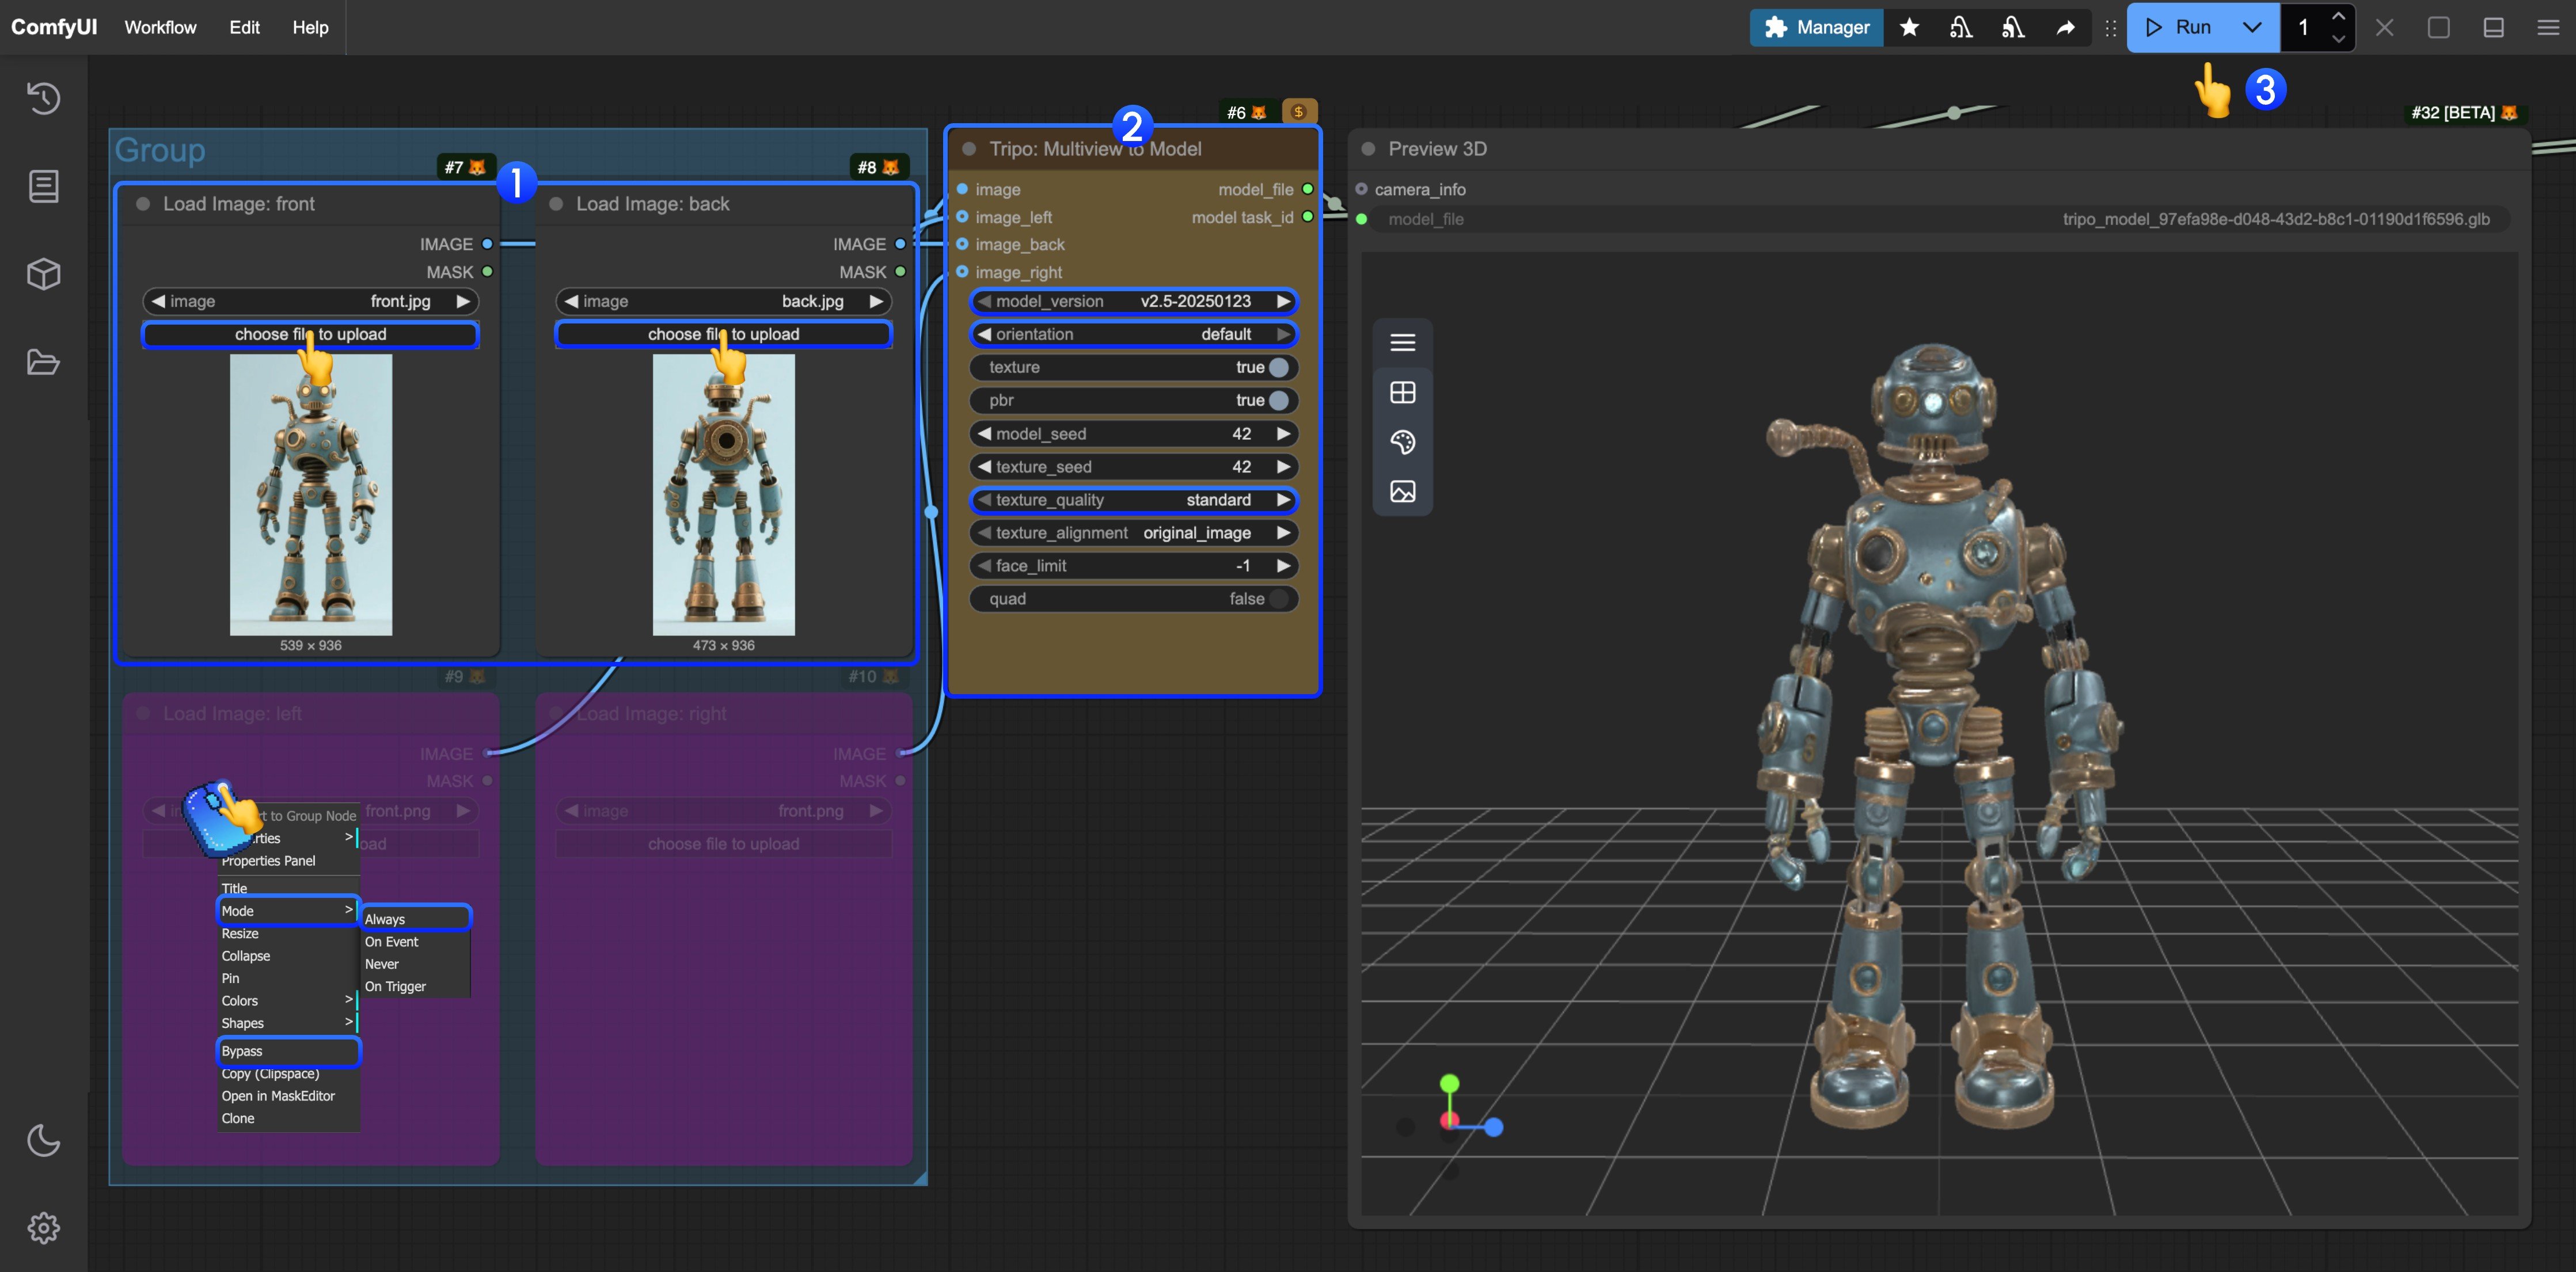
- In the
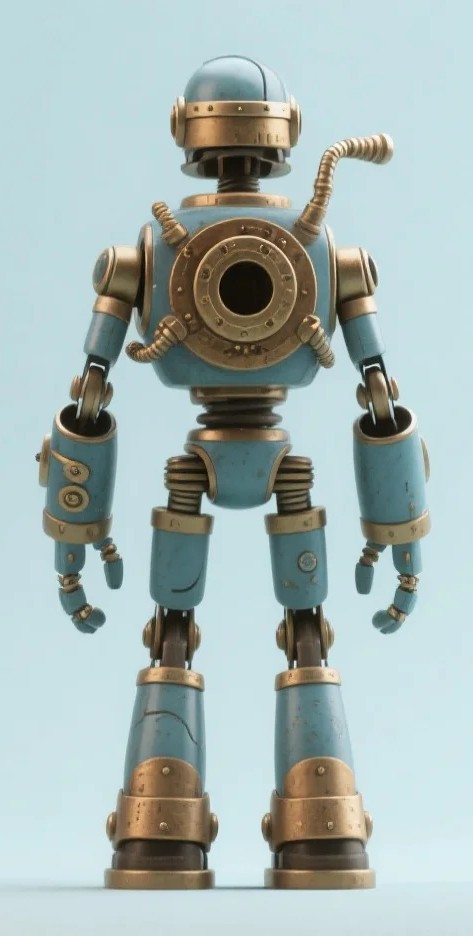
Load Imagenodes, load the provided input images respectively - In the
Tripo: Image to Modelnode, modify the corresponding parameter settings- model: You can select different models, currently only v1.4 model supports subsequent optimization with
Tripo: Refine Draft model - style: You can set different styles
- texture_quality: You can set different texture qualities
- model: You can select different models, currently only v1.4 model supports subsequent optimization with
- Click the
Runbutton, or use the shortcutCtrl(cmd) + Enterto execute model generation. After the workflow completes, the corresponding model will be automatically saved to theComfyUI/output/directory - For other view inputs, you can refer to the step diagram and set the corresponding node mode to
Alwaysto enable it - For model download, please refer to the instructions in the text-to-model section
Subsequent Task Processing for the Same Task
Tripo’s corresponding nodes provide subsequent processing for the same task, you only need to input the correspondingmodel_task_id in the relevant nodes, and we have also provided the corresponding nodes in the relevant templates, you can also modify the corresponding node mode as needed to enable it